A handheld shower head offers a number of benefits over a fixed shower head. It allows for greater flexibility and maneuverability, as you can hold the shower head in your hand and direct the water flow to specific areas of your body.
This can be particularly useful for individuals with mobility issues or disabilities, as it allows them to easily reach all parts of their body while showering.
Handheld shower heads also offer more control over the water flow and temperature, as you can adjust the settings on the head itself or on the valve controlling the water flow. This can help conserve water and energy, as you can turn the water flow down or off when not needed.
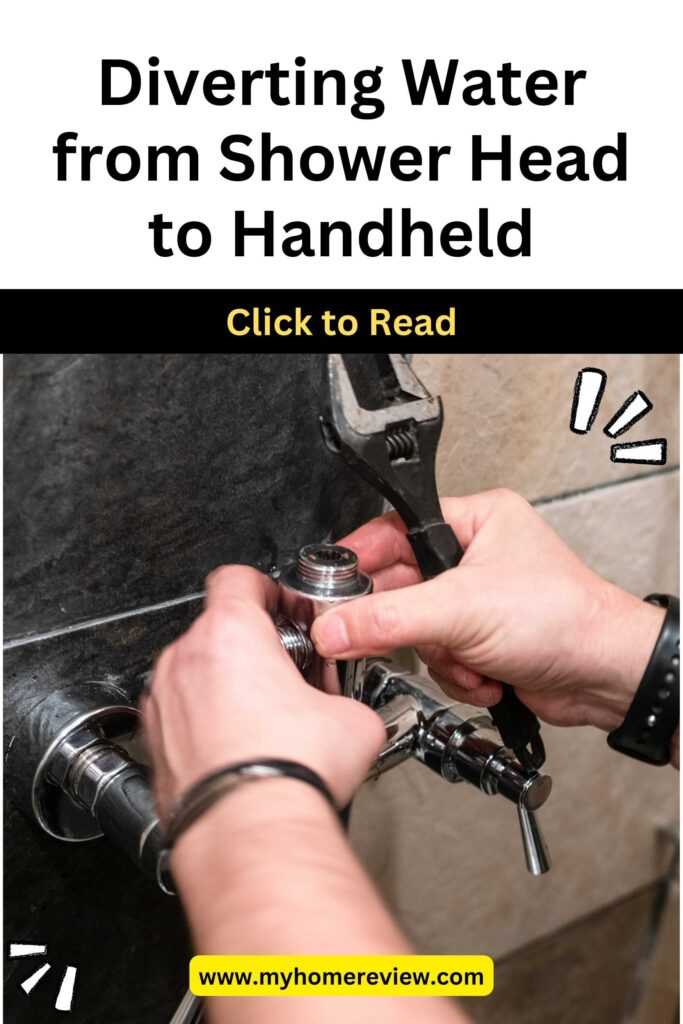
The purpose of the blog post is to provide instructions on how to divert water from a fixed shower head to a handheld one. This may be desired for any of the reasons mentioned above, or simply for the convenience of being able to switch between a fixed and handheld shower head as desired.
The instructions provided in the blog post should outline the steps needed to properly install a handheld shower head and divert the water flow from the fixed head to the handheld one.
Recommended Article: Highest-Quality Shower Heads with Soothing Massage Spray
First, here is a summary of what we have covered in this post
Safety Precautions
It is important to take safety precautions when installing a handheld shower head or working with any type of plumbing.
One important precaution is to turn off the water supply before beginning the installation process. This will prevent the risk of being sprayed with water or being electrocuted if the shower head is connected to an electrical source.
To turn off the water supply, you will need to locate the main water valve, which is typically located near the water meter or where the main water line enters your home. Once you have located the valve, turn it clockwise to shut off the water supply.
Another precaution to take when working with plumbing is to use caution to avoid accidents or injuries. This may include wearing protective gear, such as gloves and safety glasses, to protect yourself from sharp edges or hot water.
It is also a good idea to have a helper on hand to assist with the installation process and to hold tools or parts as needed.
Additionally, be sure to follow the instructions provided with the handheld shower head carefully, as deviating from the recommended installation steps can result in damage to the plumbing system or accidents.
Materials Needed
To install a handheld shower head, you will need a number of tools and supplies. The specific tools and materials you will need will depend on the type of shower head you are installing and the plumbing system in your home. However, some common tools and supplies that may be required for the installation process include:
- Adjustable wrench: This tool will be used to loosen and tighten the various fittings and connections that you will need to access during the installation process.
- Teflon tape: This is a thin, pliable tape that is used to seal threaded joints and prevent leaks. It is recommended to wrap Teflon tape around the threads of the fittings before attaching the shower head, as this will help to create a secure, watertight seal.
- Screwdriver: A screwdriver may be needed to remove the old shower head or to attach the mounting bracket for the handheld shower head.
- Mounting bracket: Most handheld shower heads come with a mounting bracket that allows the head to be mounted on the wall or on the existing shower arm. Be sure to check that you have the correct mounting bracket for your specific shower head and plumbing system.
- Plumber’s putty: This is a soft, pliable material that is used to create a watertight seal around fixtures. You may need to use plumber’s putty if you are installing a handheld shower head that requires a permanent connection to the plumbing system.
- Pipe joint compound: This is a liquid sealant that is used to create a watertight seal on threaded joints. It may be used in place of Teflon tape if desired.
In addition to these tools and materials, you may also need to have a few other items on hand, such as a bucket to catch any water that may drain from the pipes during the installation process, and a towel or rag to clean up any spills or drips.
Step-By-Step Instructions
Here are some step-by-step instructions on how to remove the fixed shower head and install the mounting bracket for the handheld shower head:
Turn off the water supply: Before you begin, make sure to turn off the water supply to the shower. This will prevent the risk of being sprayed with water or being electrocuted if the shower head is connected to an electrical source.
To turn off the water supply, you will need to locate the main water valve, which is typically located near the water meter or where the main water line enters your home. Once you have located the valve, turn it clockwise to shut off the water supply.
Remove the old shower head: Most fixed shower heads are attached to the shower arm using a mounting nut. To remove the old shower head, you will need to locate the mounting nut and use an adjustable wrench to loosen it.
You may need to apply some force to loosen the nut, as it may be tightened very securely. Once you have loosened the nut, you should be able to remove the shower head by gently pulling it away from the shower arm.
Install the mounting bracket: Most handheld shower heads come with a mounting bracket that allows the head to be mounted on the wall or on the existing shower arm.
Depending on your specific shower head and plumbing system, the mounting bracket may be installed in different ways. Follow the instructions provided with the handheld shower head to install the mounting bracket.
Attach the handheld shower head: Once the mounting bracket is installed, you can attach the handheld shower head to the bracket. First, wrap Teflon tape around the threads of the shower arm to create a watertight seal.
Then, attach the handheld shower head to the shower arm using the mounting nut that was included with the head. Tighten the nut securely using the adjustable wrench.
To secure the handheld shower head in place and ensure a proper seal to prevent leaks, it is important to follow the instructions provided with the head carefully.
Be sure to tighten all fittings and connections securely, and use Teflon tape or pipe joint compound to seal any threaded joints. If you are installing a handheld shower head that requires a permanent connection to the plumbing system, you may also need to use plumber’s putty to create a watertight seal around the fixtures.
Conclusion
In conclusion, installing a handheld shower head is a simple and cost-effective way to add flexibility and convenience to your showering experience.
Handheld shower heads offer a number of benefits, including greater maneuverability, more control over the water flow and temperature, and the ability to easily reach all parts of the body while showering.
They are also a great option for individuals with mobility issues or disabilities, as they allow for greater accessibility in the shower.
If you are interested in switching from a fixed shower head to a handheld one, the process of diverting the water flow is relatively straightforward.
By following the step-by-step instructions provided in this blog post, you should be able to remove the old shower head and install a mounting bracket for the handheld shower head with minimal effort.
With a little bit of patience and attention to detail, you can enjoy the added flexibility and convenience of a handheld shower head in no time. So why wait? Give it a try and see how much you love your new handheld shower head!
Related Post: What Are the Benefits of Using a Handheld Shower Head?
Can I Install A Handheld Shower Head Myself, Or Do I Need A Professional Plumber?
Whether you can install a handheld shower head yourself or need a professional plumber depends on your level of comfort with basic plumbing tasks, the complexity of your existing plumbing setup, and the specific installation requirements of the handheld shower head. Here’s an expanded explanation to help you decide:
Installing a Handheld Shower Head Yourself:
DIY-Friendly: For many people, installing a handheld shower head is a relatively simple and DIY-friendly task. Most handheld shower head kits come with clear instructions, making the process easier to follow.
Basic Tools: You’ll need basic tools such as an adjustable wrench, plumber’s tape (Teflon tape), and possibly a screwdriver. These are typically available in most households.
Existing Setup: If your existing shower has a standard setup with a wall-mounted shower arm or pipe, replacing the fixed shower head with a handheld one is usually straightforward. This involves removing the old shower head and attaching the handheld shower head’s hose to the shower arm or pipe.
Preparation: Turn off the water supply to your shower before beginning the installation to avoid water flow during the process. This is crucial to prevent leaks and water damage.
Mounting Bracket (if applicable): Some handheld shower head kits include a wall-mounted bracket or holder. If your shower doesn’t already have one, you may need to install it. This may require drilling holes and using anchors and screws.
Testing: Once installed, turn on the water supply and test the handheld shower head to ensure it functions correctly. Check for any leaks at the connection points and fix them if necessary.
Seeking Professional Plumbing Help:
Complex Plumbing: If your shower has a complex or non-standard plumbing setup, or if you’re unsure about the configuration of your plumbing system, it’s advisable to consult a professional plumber. They can assess the situation and make the necessary adjustments to accommodate the handheld shower head.
Non-DIY Skills: If you lack confidence in your DIY skills or have concerns about damaging your plumbing or shower tiles, it’s a good idea to hire a plumber to ensure a safe and leak-free installation.
Specific Requirements: Some handheld shower head installations may have specific requirements, such as the need for additional valves or diverter systems. A professional plumber can identify these requirements and implement them correctly.
Local Regulations: In some areas, local building codes and regulations may require certain plumbing work to be performed by a licensed plumber. Check your local regulations to ensure compliance.
In summary, many individuals can successfully install a handheld shower head themselves, especially in standard shower setups.
However, if you have reservations about your plumbing skills, encounter complex plumbing configurations, or prefer to be cautious, consulting a professional plumber is a wise choice. Professional plumbers have the expertise to handle more challenging installations and ensure that everything is installed correctly and safely.
Do I Need Any Special Tools to Install A Handheld Shower Head?
Installing a handheld shower head typically doesn’t require any specialized or uncommon tools. You can usually complete the installation with basic household tools that you may already have on hand. Here’s an explanation of the tools you might need:
Adjustable Wrench: An adjustable wrench is one of the essential tools for installing a handheld shower head. It’s used to secure the connections between the shower head components and the existing plumbing fixtures, such as the shower arm or pipe. Make sure it’s appropriately sized to fit the nuts and connections you’ll be working with.
Plumber’s Tape (Teflon Tape): Plumber’s tape, also known as Teflon tape, is a crucial item. It’s a thin, white tape that you wrap around the threads of the shower arm or pipe before attaching the handheld shower head’s hose. The tape helps create a watertight seal, preventing leaks at the connections.
Screwdriver (if necessary): Depending on the specific handheld shower head kit and installation requirements, you might need a screwdriver to attach or secure certain components. For instance, some kits include brackets or holders that need to be fastened to the wall with screws.
Drill and Anchors (if mounting a bracket): If your handheld shower head kit includes a wall-mounted bracket or holder, you may need a drill and wall anchors to securely attach it to the wall. This is typically required if your shower doesn’t already have a bracket in place.
Pliers (optional): While not always necessary, pliers can be helpful for gripping and tightening connections, particularly if you encounter stubborn or hard-to-reach nuts.
Pipe Wrench (optional): In some cases, you may need a pipe wrench to hold or secure the shower arm or pipe while you tighten the connections with the adjustable wrench. This is more common in situations where the shower arm or pipe is large or difficult to grip.
In summary, the tools required to install a handheld shower head are generally basic and readily available. An adjustable wrench and plumber’s tape are the primary tools you’ll need for most installations.
However, it’s a good practice to check the instructions provided with your specific handheld shower head kit, as some kits may have unique components or requirements that necessitate additional tools or materials.
What Should I Do If I Can’t Loosen the Mounting Nut on The Old Shower Head?
Encountering difficulty when trying to loosen the mounting nut on the old shower head can be frustrating, but there are several steps you can take to address this issue. Here’s an expanded explanation of what to do if you can’t loosen the mounting nut:
Apply Penetrating Oil:
Start by applying a penetrating oil or lubricant, such as WD-40, to the nut. Let it sit for at least 15-20 minutes to penetrate and loosen any corrosion or mineral deposits that may be causing the nut to seize.
Use the Right Tool:
Ensure you’re using the correct tool for the job. An adjustable wrench or pliers are commonly used to grip and turn the mounting nut. Make sure the tool is appropriately sized to fit the nut snugly, as using an ill-fitting tool can lead to further damage.
Apply Steady Pressure:
Hold the shower arm securely with one hand to prevent it from twisting or bending while you try to turn the mounting nut. Apply steady and controlled pressure in the counterclockwise direction (lefty loosey) with the wrench or pliers to loosen the nut. Avoid using excessive force, as this can damage the shower arm or plumbing connections.
Use Heat:
If the nut remains stubborn, you can use heat to expand the metal slightly, making it easier to loosen. Use a heat source like a hairdryer or a heat gun to gently warm the nut for a few minutes. Be cautious not to overheat or damage the surrounding materials.
Tap Gently:
Lightly tap the nut with a rubber mallet or a block of wood and a hammer to help break loose any corrosion or rust. Tapping can help to shock the threads and make it easier to turn.
Reverse Direction:
In some cases, especially if the nut is particularly tight, try turning it slightly clockwise (righty tighty) first. This reverse motion can help break the initial resistance, making it easier to turn counterclockwise afterward.
Use Two Wrenches (if accessible):
If you can access both sides of the mounting nut (for instance, if you have access behind the wall), you can use two wrenches simultaneously. Hold one wrench on the nut while turning the other wrench in the opposite direction to create more torque.
Seek Professional Help:
If all else fails and you’re concerned about damaging the shower arm or plumbing, it’s advisable to seek the assistance of a professional plumber. They have the experience and tools necessary to tackle challenging situations and can help avoid costly damage or repairs.
Remember to be patient and methodical when attempting to loosen a stubborn mounting nut. Rushing or using excessive force can lead to unintended consequences, so proceed carefully and use the steps above to gradually release the nut without causing harm to your shower or plumbing fixtures.
Can I Use My Handheld Shower Head in Place of My Fixed Shower Head, Or Do I Need to Switch Between the Two?
Whether you can use your handheld shower head in place of your fixed shower head or need to switch between the two depends on your specific shower setup and the features of your handheld shower head. Here’s an expanded explanation:
Using Handheld in Place of Fixed Shower Head:
In many cases, you can use your handheld shower head as a replacement for the fixed shower head. If your shower plumbing includes a standard wall-mounted shower arm or pipe, you can simply detach the fixed shower head and attach the handheld one in its place.
This is a straightforward swap that allows you to enjoy the convenience and versatility of the handheld shower head without needing both simultaneously.
Switching Between the Two:
Some showers are designed to allow you to switch between the fixed and handheld shower heads. To achieve this, you might have a diverter valve or a dual shower head system. The diverter valve is typically located on the shower wall or the handheld shower head itself.
It lets you toggle between using one or the other or even both simultaneously. Dual shower head systems include both a fixed and handheld shower head, each with its own water source, and you can use them independently or together.
Compatibility and Installation:
Before using your handheld shower head in place of the fixed one, ensure that the handheld model is compatible with your shower’s plumbing and attachments. The handheld shower head should have a standard connection that fits the shower arm or pipe.
Additionally, check if you have a mounting bracket or holder for the handheld shower head, as it may need to be installed to hold the handheld unit securely.
Personal Preference:
Whether you choose to use your handheld shower head exclusively or switch between the two depends on your personal preferences and specific needs.
Using the handheld shower head can offer benefits like targeted rinsing, convenience for bathing children or pets, and efficient cleaning, making it a practical choice for everyday use. However, some individuals prefer the traditional overhead shower experience provided by the fixed shower head for regular showers.
Water Conservation:
Consider the water conservation aspect as well. If you have concerns about water usage and want to minimize it, using only the handheld shower head for tasks that require less water may be a good strategy, as many handheld units come with water-saving features and adjustable flow rates.
In summary, you can often use your handheld shower head in place of your fixed shower head if you have a standard shower arm or pipe.
However, some showers are designed for switching between the two, and in that case, you can enjoy the flexibility of using either or both as needed. Ultimately, the choice depends on your preferences, specific shower setup, and the features of your handheld shower head.